Video Editor in iPhone: The Ultimate Guide to Mobile Video Editing
Introduction
Video Editor in iPhone: The Ultimate Guide to Mobile Video Editing
In recent years, the popularity of video editing on mobile devices has skyrocketed, and the video editor in iPhone has become a game-changer for content creators and casual users alike. With the advanced camera technology and powerful processing capabilities of the latest iPhones, editing videos on the go has never been easier or more accessible. Whether you’re a vlogger, a social media enthusiast, or just someone who loves to capture and share moments, the convenience and versatility of using a video editor in iPhone make it an indispensable tool in your creative arsenal.
The iPhone’s seamless integration of hardware and software allows users to shoot, edit, and share high-quality videos all from one device. This growing trend is not just a passing fad but a reflection of how technology is evolving to meet the needs of a dynamic, content-driven world. The App Store is brimming with powerful video editing apps that cater to every skill level, from beginners to professionals, making it easy for anyone to produce stunning videos without the need for a traditional computer setup.
As the capabilities of mobile video editors continue to expand, more people are embracing the convenience and creative potential that comes with editing videos directly on their iPhones. Whether you’re adding a few finishing touches to a family video or creating professional-grade content for your YouTube channel, the right video editor in iPhone can elevate your videos and unleash your creativity.
Top Video Editing Apps for iPhone

iMovie
Description:
iMovie is Apple’s own video editing app, designed to be user-friendly and highly efficient. It’s a perfect starting point for beginners but also offers enough features to satisfy intermediate users.
Key Features:
- Intuitive interface with drag-and-drop functionality
- Pre-made templates and themes for quick edits
- Advanced features like split-screen, green screen, and audio editing
- Seamless integration with iCloud for easy file sharing
Pros:
- Free with no in-app purchases
- Simple and easy to use
- Optimized for Apple devices
Cons:
- Limited advanced editing features compared to other apps
- May not satisfy professional editors
LumaFusion
Description:
LumaFusion is a professional-grade video editor designed for those who need advanced features and flexibility. It’s widely used by journalists, filmmakers, and video producers.
Key Features:
- Multi-track timeline for complex editing
- Support for 4K video editing
- Wide range of effects, transitions, and color correction tools
- Advanced audio editing with keyframe support
Pros:
- Comprehensive set of features
- Suitable for professional editing
- Regular updates and support
Cons:
- Paid app, relatively expensive
- Steeper learning curve
Adobe Premiere Rush
Description:
Adobe Premiere Rush is a cross-platform video editor that allows you to edit on your iPhone and continue on your desktop. It’s aimed at content creators who need powerful tools on the go.
Key Features:
- Cross-device sync with Adobe Creative Cloud
- Customizable motion graphics templates
- Multi-track timeline for more detailed editing
- Direct sharing to social media platforms
Pros:
- Seamless integration with other Adobe products
- User-friendly interface
- Cloud-based project syncing
Cons:
- Requires a subscription for full features
- Some advanced features are missing compared to desktop version
InShot
Description:
InShot is a popular video editor known for its simplicity and efficiency, making it ideal for social media content creators. It offers a wide range of basic and fun editing tools.
Key Features:
- User-friendly interface with simple controls
- Wide range of filters, effects, and transitions
- Tools for adjusting speed, cropping, and rotating videos
- Built-in music library and sound effects
Pros:
- Easy to learn and use
- Affordable with free version available
- Great for quick edits and social media content
Cons:
- Limited advanced features
- Watermark on videos in the free version
Basic Editing Tips
How to Get Started with Video Editing on an iPhone
Getting started with video editing on an iPhone is straightforward and can be a fun and rewarding experience. Here’s a step-by-step guide to help you begin:
Choose the Right App: Start by selecting a video editing app that suits your needs. For beginners, iMovie is a great choice due to its user-friendly interface. Download and install the app from the App Store.
Import Your Footage: Open your chosen app and import the video clips you want to edit. You can do this directly from your camera roll or any cloud storage service you use.
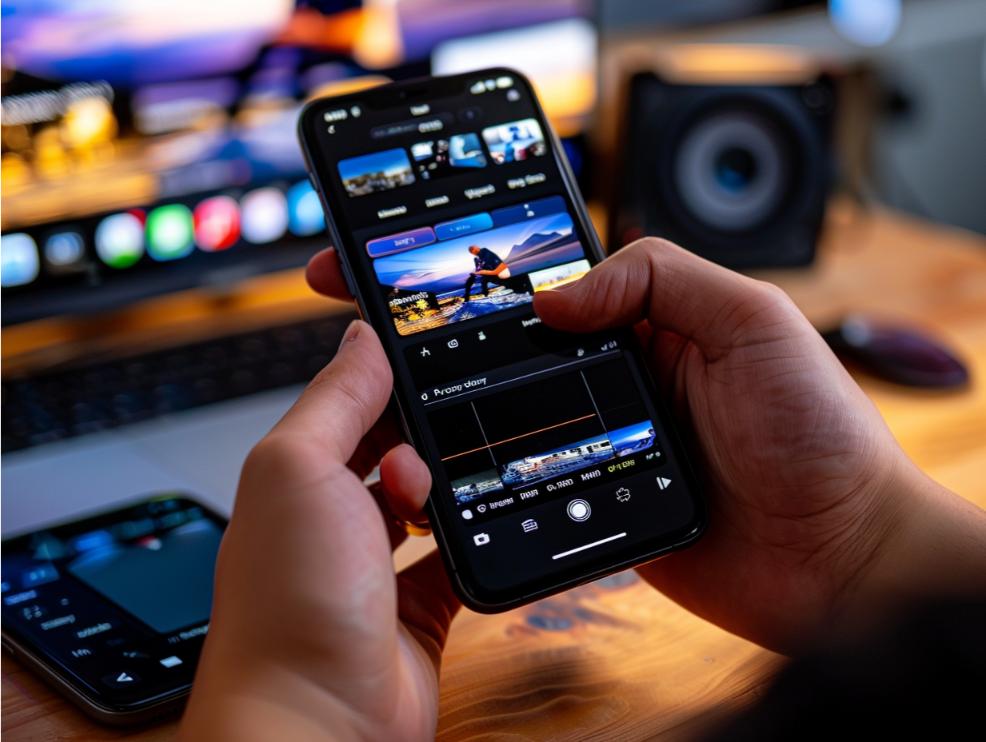
Familiarize Yourself with the Interface: Spend some time exploring the app’s interface. Most video editing apps have similar basic functions, such as a timeline, preview window, and toolbar with various editing tools.
Start Editing: Begin by dragging and dropping your video clips onto the timeline. This is where you’ll make all your edits and adjustments.
Tips for Shooting Better Videos with an iPhone Camera
Before you start editing, capturing high-quality footage is essential. Here are some tips for shooting better videos with your iPhone:
Use Proper Lighting: Good lighting is crucial for high-quality videos. Shoot in well-lit environments or use external lights if necessary. Avoid harsh shadows and overly bright spots.
Keep It Steady: Use a tripod or a stabilizer to keep your iPhone steady while filming. If you don’t have these, try to hold your phone with both hands and keep your elbows close to your body for stability.
Focus and Exposure: Tap on the screen to set the focus and adjust the exposure. Lock the focus and exposure settings by holding down on the screen until you see the AE/AF Lock indicator.
Shoot in Landscape Mode: For most videos, especially those intended for YouTube or other social media platforms, shoot in landscape mode to ensure a wider and more professional-looking frame.
Use the Rule of Thirds: Enable the grid feature in your iPhone’s camera settings to help compose your shots using the rule of thirds. This makes your videos more visually appealing.
Basic Editing Techniques
Once you have your footage, it’s time to start editing. Here are some basic editing techniques to help you create polished videos:
Cutting and Trimming: Cutting involves removing unwanted parts of your video. Trimming allows you to shorten or lengthen clips. To do this, select the clip on your timeline and drag the edges to adjust its length.
Adding Transitions: Transitions help smooth the change from one clip to another. Most editing apps offer a variety of transition effects, such as fades, dissolves, and wipes. To add a transition, select the space between two clips and choose your desired transition effect.
Adjusting Speed: Speed adjustments can make your video more dynamic. You can speed up a clip for a time-lapse effect or slow it down for dramatic emphasis. Most apps have a speed adjustment tool, usually represented by a speedometer icon.
Adding Music and Sound Effects: Enhance your video with background music or sound effects. Import your audio files and place them on the audio track of your timeline. Adjust the volume levels to ensure your audio complements the visuals.
Applying Filters and Effects: Filters and effects can give your video a unique look and feel. Experiment with different options to find the best match for your video’s mood and style. Most apps offer a variety of filters and effects that can be applied with a single tap.
By mastering these basic editing techniques, you’ll be able to transform your raw footage into a cohesive and engaging video. As you become more comfortable with the process, don’t hesitate to explore more advanced features and tools to further enhance your videos.
Advanced Editing Techniques
Using Advanced Features: Color Correction, Audio Adjustments, and Special Effects
Color Correction:
- Purpose: Enhance the visual appeal of your videos by adjusting colors, brightness, contrast, and saturation.
- How to Use: Most advanced video editing apps, like LumaFusion and Adobe Premiere Rush, offer color correction tools. Select a clip, then access the color correction panel to adjust the settings. Play around with the sliders until you achieve the desired look. Some apps also offer color grading presets to streamline the process.
Audio Adjustments:
- Purpose: Improve the sound quality of your videos, ensuring clear dialogue and balanced background music.
- How to Use: Access the audio editing panel in your app. Adjust the volume levels of different audio tracks to create a balanced mix. Use equalizers to enhance specific frequency ranges and remove unwanted background noise. Keyframe audio adjustments to change volume levels at specific points in the timeline for dynamic audio control.
Special Effects:
- Purpose: Add visual interest and creativity to your videos with effects like slow motion, fast motion, green screen, and more.
- How to Use: Select the clip you want to apply an effect to, then choose the special effects option in your app. For slow motion or fast motion, adjust the speed settings. To use green screen (chroma key), place your subject in front of a green backdrop and use the chroma key tool to replace the background with any image or video.
How to Layer Video and Audio Tracks for More Complex Edits
Layering video and audio tracks allows for more sophisticated and polished videos. Here’s how to do it:
Adding Multiple Video Tracks:
- Purpose: Combine different video clips, overlays, and effects for a richer visual experience.
- How to Use: Most advanced apps support multi-track editing. Add additional video tracks to your timeline by dragging clips above or below existing ones. Use the opacity and blending modes to create overlays and picture-in-picture effects. Arrange the clips to ensure they play simultaneously or in sequence as needed.
Layering Audio Tracks:
- Purpose: Enhance your video’s sound design by combining dialogue, music, sound effects, and ambient noise.
- How to Use: Import multiple audio files and place them on separate audio tracks. Adjust the volume and pan settings to ensure each audio element is clear and balanced. Use keyframes to fade audio in and out at specific points. Layering ambient sounds and subtle effects can add depth to your video’s audio landscape.
Tips for Adding Text, Captions, and Animations
Adding Text and Captions:
- Purpose: Provide context, emphasize points, and improve accessibility.
- How to Use: Select the text tool in your app and choose a template or customize your own. Position the text on the screen and adjust the font, size, color, and style. For captions, ensure they are readable by placing them in a consistent location and using a contrasting color. You can also add text animations to make them appear dynamically.
Incorporating Animations:
- Purpose: Add visual interest and engagement with animated elements.
- How to Use: Most advanced apps offer pre-made animations or allow you to create custom ones. Select the animation tool and choose from options like fade, slide, or zoom. Apply the animation to text, images, or video clips. Keyframe animations for precise control over movement and timing. Combining different animations can create complex and engaging visual effects.
Exporting and Sharing Videos

Best Practices for Exporting Videos in Different Formats and Resolutions
Choose the Right Format:
- Common Formats: The most widely used video formats include MP4, MOV, and AVI. MP4 is often preferred for its balance of quality and file size, making it ideal for social media and web uploads.
- How to Choose: Consider where you’ll be sharing your video. MP4 is generally the best choice for social media, while MOV might be preferred for higher-quality needs.
Select the Appropriate Resolution:
- Common Resolutions: 1080p (Full HD) is standard for most platforms, providing a good balance of quality and file size. For higher-quality needs, 4K (Ultra HD) is an option, but it results in larger files.
- How to Choose: Match the resolution to your content and audience. For YouTube or professional use, 4K may be ideal. For quick social media posts, 1080p is usually sufficient.
Frame Rate Settings:
- Common Frame Rates: 24fps for a cinematic look, 30fps for general use, and 60fps for smooth motion in action shots.
- How to Choose: Most videos are fine at 30fps. Use 24fps for a film-like effect or 60fps for sports and fast-action videos.
Bitrate Considerations:
- What It Is: Bitrate affects the video quality and file size. Higher bitrates provide better quality but result in larger files.
- How to Choose: Aim for a balance. For online sharing, a bitrate of 8-12 Mbps for 1080p and 35-45 Mbps for 4K is generally recommended.
Audio Settings:
- Standard Settings: Export with a sample rate of 48kHz and a bitrate of 192 kbps for good quality.
- How to Choose: Ensure your audio settings complement your video quality without excessively increasing file size.
How to Share Your Edited Videos on Social Media Platforms Directly from Your iPhone
Export the Video:
- Finalizing Edits: Once your editing is complete, select the export or share option in your video editing app.
- Settings: Choose the desired format, resolution, and settings based on the guidelines above.
Save to Camera Roll:
- Default Option: Most apps will allow you to save the final video to your iPhone’s camera roll. This makes it easy to access and share the video from any social media app.
Sharing Directly from Editing Apps:
- In-App Sharing: Many editing apps, like Adobe Premiere Rush and InShot, offer direct sharing options to social media platforms. Select the share button, choose the platform (e.g., Instagram, YouTube, Facebook), and log in if prompted.
- Customization: Customize your post, add descriptions, tags, and choose the appropriate settings directly from the app before sharing.
Using Social Media Apps:
- Manual Sharing: Open the social media app where you want to share the video. Create a new post and select the video from your camera roll.
- Customization: Add captions, hashtags, and tags to enhance visibility and engagement. Each platform has specific features, such as adding filters on Instagram or thumbnails on YouTube.
Optimizing for Each Platform:
- Instagram: Videos should be under 60 seconds for posts, up to 15 minutes for IGTV, or 15 seconds for Stories. Use square (1:1) or vertical (9:16) formats for best results.
- YouTube: Longer videos are suitable. Use a custom thumbnail and detailed description with tags for better search visibility.
- Facebook: Videos can be up to 240 minutes. Use catchy titles and thumbnails to grab attention in the feed.
- TikTok: Short, engaging videos work best, usually under 60 seconds. Use trending sounds and hashtags.
Conclusion
Using a video editor in iPhone offers numerous benefits, making it an essential tool for both amateur and professional video creators. The convenience of editing directly on your iPhone means you can create stunning videos anytime, anywhere, without needing a computer. With a variety of powerful apps available, from user-friendly iMovie to the feature-rich LumaFusion, there’s something for everyone, regardless of skill level.
The advanced camera technology and processing power of iPhones enable you to shoot high-quality footage and edit it seamlessly. You can enhance your videos with color correction, audio adjustments, special effects, and more, right from your device. Layering video and audio tracks, adding text and captions, and incorporating animations are just a few of the techniques that can elevate your videos to a professional standard.
We encourage you to experiment with different apps and techniques to find the best fit for your creative vision. Each app offers unique features and tools, so trying out various options will help you discover what works best for your projects. Don’t be afraid to mix and match techniques to develop your own editing style.

