Cinematic Film Techniques for Vloggers
In the ever-evolving world of YouTube and vlogging, standing out from the crowd can be a challenge. One way to elevate your content and captivate your audience is by incorporating cinematic film techniques into your vlogs. These techniques, often seen in movies and professional videos, can bring a new level of polish and professionalism to your work. In this post, we’ll explore various cinematic techniques and how you can apply them to your vlogging routine.
Understanding Cinematic Techniques
Cinematic techniques are methods used in filmmaking to convey a story visually. These include a variety of elements such as composition, lighting, camera movement, and sound. Originally developed for the big screen, these techniques have found their way into various forms of video production, including vlogs. By understanding and using these techniques, you can create visually stunning and engaging videos that hold your audience’s attention.
The importance of cinematic techniques in storytelling cannot be overstated. They help set the mood, emphasize key moments, and make your content more engaging. For vloggers, using these techniques can transform simple, everyday moments into captivating narratives that resonate with viewers.
Essential Cinematic Techniques for Vloggers
 Composition and Framing
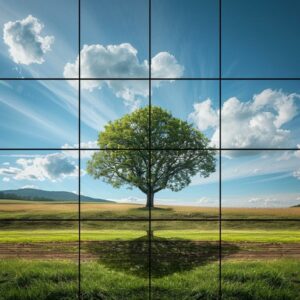
Rule of Thirds: This classic technique involves dividing your frame into nine equal parts with two horizontal and two vertical lines. Placing your subject along these lines or at their intersections can create a balanced and aesthetically pleasing shot. This technique helps guide the viewer’s eye and makes your shots more dynamic.
Leading Lines: Use natural lines in your environment to guide the viewer’s eyes towards your subject. This can be anything from a road to a row of trees. Leading lines help create depth and draw attention to specific parts of your frame, making your shots more engaging.
Symmetry and Balance: Symmetrical shots can be striking and draw viewers’ attention, while balanced shots create harmony within the frame. Symmetry can be used to convey order and stability, whereas imbalance can create tension and interest.
Lighting
Natural vs. Artificial Lighting: Natural light is often the easiest and most cost-effective way to light your vlogs. However, understanding how to manipulate artificial lights can give you more control over your visuals. Experiment with different times of the day to see how natural light affects your shots.
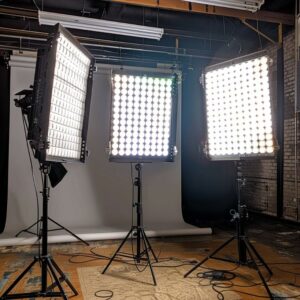
Three-Point Lighting Setup: This involves using three lights (key light, fill light, and back light) to create depth and dimension in your shots. The key light is the primary source of illumination, the fill light reduces shadows, and the back light separates the subject from the background. For vloggers on a budget, consider using household lamps or inexpensive LED lights to achieve a similar effect.
Using Shadows and Highlights: Play with shadows and highlights to add drama and mood to your scenes. Shadows can create mystery and depth, while highlights can draw attention to important elements. For instance, if you’re vlogging about a dramatic event, using low-key lighting (with more shadows) can enhance the mood.
Camera Movements
Panning and Tilting: Smooth movements can make your shots more dynamic. Panning involves moving the camera horizontally, while tilting moves it vertically. These techniques can be used to follow action or reveal new information. For example, a slow pan across a scenic landscape can set the scene, while a quick tilt down can reveal a surprise element.
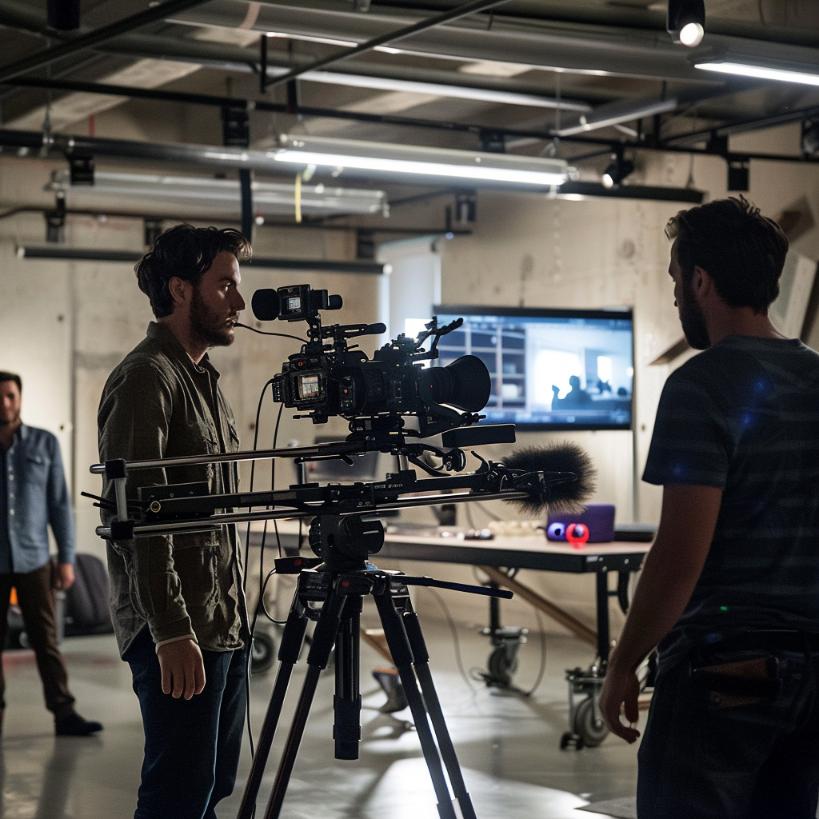
Tracking and Dolly Shots: These shots follow the subject, either by moving the camera along with them (tracking) or using a wheeled platform (dolly). These movements add a professional touch and can make your videos more engaging. If you don’t have access to a dolly, consider using a skateboard or any smooth surface to achieve similar results.
Handheld Shots vs. Stabilized Shots: Handheld shots can add a sense of immediacy and realism, but stabilized shots are crucial for maintaining professionalism. Use a gimbal or tripod to keep your shots steady when needed. Handheld shots are great for action sequences or when you want to convey a sense of urgency, while stabilized shots are ideal for interviews or static scenes.
Focus and Depth of Field
Shallow vs. Deep Focus: Shallow focus isolates the subject from the background, making them stand out. Deep focus keeps both the foreground and background in sharp focus. Choose the type of focus based on the story you want to tell. Shallow focus can be used in personal vlogs to highlight facial expressions and emotions, while deep focus is great for capturing detailed environments.
Rack Focus Technique: This involves shifting focus from one subject to another within the same shot, guiding the viewer’s attention. It’s a powerful way to highlight important details and create a connection between different elements. Use rack focus to reveal new information or change the viewer’s perspective within a scene.
Color Grading
Basic Color Correction: Correcting colors in post-production ensures that your footage looks natural and consistent. Adjusting white balance, contrast, and saturation can significantly improve the quality of your videos. Even simple tools like iMovie or mobile apps can be used to make these adjustments.
Creating Mood with Color Grading: Different color tones can evoke various emotions. Experiment with warm and cool tones to set the mood of your scenes. Warm tones can create a cozy, inviting atmosphere, while cool tones can convey calmness or tension. For example, a travel vlog might use warmer tones to evoke the feeling of a sunny, tropical destination.
Sound Design
Importance of Clear Audio: Good audio is as important as good visuals. Invest in a quality microphone and ensure your audio is clear and free from background noise. Clear audio makes your content more professional and enjoyable to watch. Lavalier mics are great for on-the-go recording, while shotgun mics are ideal for controlled environments.
Using Background Music and Sound Effects: Music and sound effects can enhance the emotional impact of your videos. Choose tracks that complement the tone and pace of your vlogs. Sound effects can add realism and depth to your scenes. Websites like Epidemic Sound and SoundStripe offer royalty-free music and effects for creators.
Syncing Audio with Visuals: Ensure that your audio is in sync with the visuals to maintain a professional look. Mismatched audio can be distracting and reduce the quality of your content. Use clapperboards or simple hand claps to sync audio and video during editing.
Practical Tips for Vloggers
 Planning and Storyboarding
- Plan your shots and create a storyboard to visualize your vlog before you start filming. This can help you stay organized and ensure you capture all the necessary footage. Storyboarding allows you to plan your shots in advance, making the filming process smoother and more efficient. Consider using apps like Storyboarder or creating simple sketches to map out your scenes.
Choosing the Right Equipment
- While high-end equipment can improve your production quality, it’s not always necessary. Many vloggers create stunning content with just a smartphone and a few affordable accessories. Invest in a good tripod, microphone, and basic lighting kit to get started. As you grow, you can gradually upgrade your gear. Look for second-hand equipment or budget-friendly options to build your toolkit without breaking the bank.
Editing Tips
- Editing is where the magic happens. Use software like Adobe Premiere Pro or Final Cut Pro to enhance your footage. Focus on cutting out unnecessary parts, adding transitions, and color grading to give your vlog a cinematic feel. Pay attention to pacing and rhythm to keep your audience engaged. Consider adding text overlays, motion graphics, and visual effects to further enhance your videos.
Examples of Popular Vloggers
- Look at popular vloggers who use cinematic techniques. Casey Neistat, Peter McKinnon, and Sara Dietschy are great examples. Analyze their videos and take note of how they use different techniques to tell their stories. Observing successful vloggers can provide inspiration and ideas for your own content. Watch their behind-the-scenes videos and tutorials to learn their techniques and workflows.
Conclusion
Incorporating cinematic film techniques into your vlogs can significantly elevate the quality of your content. From mastering composition and lighting to understanding camera movements and sound design, these techniques will help you create engaging and visually stunning videos. Don’t be afraid to experiment and find your unique style. Share your experiences or ask questions in the comments below – we’d love to hear from you!
By embracing these cinematic techniques, you’ll not only improve the aesthetic quality of your vlogs but also enhance your storytelling capabilities, keeping your audience coming back for more. Happy vlogging!
Remember, practice makes perfect. The more you experiment with these techniques, the more natural they will become. Keep filming, keep editing, and most importantly, keep sharing your unique perspective with the world. Your journey to creating cinematic vlogs starts now!

